Without it there is no possibility of taking a picture at all.
The very name "photography" who's 2 root words are greek in origin underline the importance... "Photo" meaning light and "Graphy" meaning writing. In essence, that is exactly what we are doing, we're "writing with light" to our chosen source of media. The media can be either film or digital.
During those times that conditions would not normally permit us to take pictures of acceptable quality, this is when we can compensate artificially. Times like when the sun has gone down or inside locations where the lighting is low or of a colour that is not condusive for an acceptable result or during times we need to reduce or eliminate shadows, we can use various artificial sources.
There are many methods, starting with the basic flash that is built-in to our cameras to off camera strobes and advanced multiple studio lights. Knowing how to use them can help us open up a whole new world of photography.
All light (natural, on or off camea strobes or flashes) has colour and does affect our photographs. Light colour is refered to being either "warm" or "cold". Pictures with a colour tinge of blue are referred to as being "cold", where pictures with a lot of light that is orange or red is referred to as being "warm". These colour temperatures are measured in kelvin or "K". The lower the colour temperature is measured at, the colder (and bluer in shade), it becomes. The higher, the warmer (and orange/red), it becomes. As a general guide, 3200K and numerically lower is in the "warm" range whereas 4000 kelvin and numerically higher are considered into the "cool" range.
The concept of controlling the hue or the temperature of light is called controlling your WHITE BALANCE or WB for short.
A few hints. Knowing what colour temperatures you will encounter under certain circumstances will help you to know what to set your camera to, or what to set the settings to in the post process phase.
As an example, my studio strobes are set to a white balance (WB), of 5200K. Setting my camera's white balance setting to 5200K results in natural skin tones and accurate colours.
A few other examples are:
Color Temperature --------- Light Source
1000-2000 K -------------- Candlelight
2500-3500 K -------------- Tungsten Bulb (household variety)
3000-4000 K -------------- Sunrise/Sunset (clear sky)
4000-5000 K -------------- Fluorescent Lamps
5000-5500 K -------------- Electronic Flash
5000-6500 K -------------- Daylight with Clear Sky (sun overhead)
6500-8000 K -------------- Moderately Overcast Sky
9000-10000 K ------------- Shade or Heavily Overcast Sky
Now we could start to explain in more complex terms how WB is the spectrum of light which is radiated from a "blackbody" with that surface temperature and how it all relates to wavelength vs intensity, but for the time being, I wish to keep it simple and in relation to our level of understanding and how it pertains to photography. A more complex explanation can be added at a later time... but now let's have some fun.
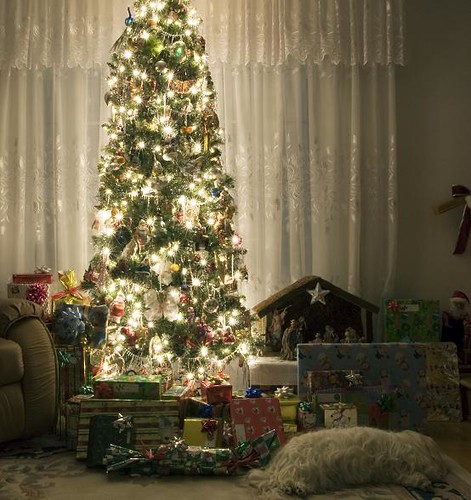
The examples I am showing are not photographically perfect, but as examples they work acceptably. At this point, I invite you to take a look at the pictures and then, try taking pictures of an object of your choice, but at wildly different WB settings, as well as the auto WB setting on your camera. Look at the results. If your camera doesn't have adjustable WB settings, for the time being, it is enough that you understand the basic concept of different light colours and their effects. Knowing this will help us to recognize and correct for those times when our camera doesn't choose correctly.
An example of the WB setting set to too cool a setting. Note the overall blue hue of the picture:
An example of the WB setting set to too warm a setting. Note the overall orange/red hue of the picture:

An example of the WB setting set to an approximately correct a setting (ok, its still a little harder on the green side, but a lot closer, yes? :o)

Additional Note #1: There are basically 3.5 ways to get a picture with the "correct" WB setting:
Additional Note #2:
In my next post will discuss our built-in on camera flash... how to use them, how we can improve on them and their limitations.

An example of the WB setting set to an approximately correct a setting (ok, its still a little harder on the green side, but a lot closer, yes? :o)

Give it a try on your camera and see how it turned out!
Additional Note #1: There are basically 3.5 ways to get a picture with the "correct" WB setting:
- The first is to have your camera WB setting set to AUTO or to set it to the correct WB setting for the conditions manually. The "0.5" way is to use a grey card or a known white object (white wall or styrofoam cup anyone?) and have the camera auto-set itself while shooting the object.
- The second way is to set your camera WB to auto and shoot in RAW format if your camera supports it and adjust it in post process. Usually a simple slider in Adobe Camera Raw sets and easily changes the WB settings effectively. Lightroom v.2.x has a WB dropper tool where you click on a white object anywhere in the shot and it automatically adjusts the WB.
- The third way is the most complicated/challening and potentially the least accurate, and that is to change it manually via complex colour maniplation in the program of your choice while the file is in another format other than RAW (JPG and TIFF come to mind). It is not easy to change the WB of an object once you are no longer in RAW format or outside of ACR (Adobe Camera Raw) in programs that support it (Photoshop and/or Lightroom v.2.x)
Additional Note #2:
My preferred method is not not bother with WB settings in camera, it is always set to AUTO WB and to shoot exclusively in RAW and adjust using Adobe Camera Raw. If using Lightroom, I set the WB using the WB dropper tool in one picture and then can sync those WB settings across all pictures where the light was consistently the same. This is the fastest, easiest and most accurate way to do it, in my experience. If your camera doesn't support it or you do not wish to use RAW format, the next most accurate way is to use in camera settings. Let the camera choose the proper WB automatically by shooting a white object or using a 18% grey card.
Most modern digital cameras can do a good job of automatically detecting and using the right settings, but they are not always 100% accurate under more extreme conditions like football stadiums or ice rinks/arenas. Getting it right in camera saves you time later, if you are so inclined.
Additional Note #3:
Professional protrait photographers will employ the use of something called a GREY CARD. This is a piece of plastic or cardboard material that is a precise 18% grey. After setting light strengths and ratios, they will likely shoot in RAW file format and have the model hold one of these cards as the photographer takes a test picture. This picture then becomes the reference picture as, using the grey card, the picture's tonality is perfectly set in post process. Certain programs like LightRoom, for example, can then copy the white balance from one picture (your reference picture) to many other pictures taken in the same lighting circumstances, drastically reducing post processing time. This is one of my preferred methods in a studio portrait environment.
In my next post will discuss our built-in on camera flash... how to use them, how we can improve on them and their limitations.
