May 11, 2012... I am at a client working on a particularly nasty server related issue and I get a call from my camera provider that I have a shiny gold box waiting for me... well, right then and there I make arrangements to complete the task and zip off to pick up the camera.
I think this had to be the fastest multi-thousand dollar sale that the guy at the counter ever made, because we were in and out of the store all within 5 minutes!
On the way home, I'm already contemplating whether or not I am going to do the "traditional" un-boxing video, but by the 1/2 way mark home, the choice is made and the un-boxing video is given the go.
Man, I was really anxious and all kinds of things were running through my head, but mostly I am just ready to burst inside because I am **SO** excited and just want to rip that box apart and start using Nikon's flagship camera right now... lol.
Some good sense returned long enough for me to make the video with some semblance of sanity and I actually had fun putting the video together, with the special touch that no one has ever done... each part is clearly identified on the screen as they are taken out of the box.
Some good sense returned long enough for me to make the video with some semblance of sanity and I actually had fun putting the video together, with the special touch that no one has ever done... each part is clearly identified on the screen as they are taken out of the box.
Anyways, yes, the video was eventually completed, and yes, I placed it on YouTube:
Well, after that, I started just playing with the camera, but even before I received the camera, weeks before it came I already downloaded the manuals from Nikon Europe a good 2 weeks before Nikon USA or Canada even had them available and I was reading and already learning about this amazing camera.
When I finally got the camera in my hands, I just tested a few of my lenses on the D4 and the results were awesome right out of the box. The shots seemed sharper and the skin tones were incredible, dynamic range increases were visible with the naked eye and the bokeh (background blur) just seemed much more "creamy" and just wonderful. Of course high ISO performance was out of this world and ISO 12,800 is as useable as ISO 1600 on my D700... just amazing.
Here are a couple of the first shots I took with the D4 using different lenses I own:
D4 and Sigma 15mm F/2.8 fisheye lens:

D4 and Sigma 105mm F/2.8 macro:

D4 and Nikkor 45mm PC-E Tilt-Shift lens:

While reading the PDF of the manuals on my iPad2, I knew that one of the first things that I wanted to try was the option of having the camera photos displayed on a wireless setup using an iPad2. Looking up the price of the WT-5 wireless transmitter, I saw the astronomical price of over $900 after taxes and though "wow, there has to be a more affordable way!". Indeed there was, and the answers came from NikonRumors.com, but none of their solutions were near as feature rich as I wanted nor had all the characteristics I would desire.
Sure, they let you use a battery powered router but my criteria was much more exact. I wanted my setup to do the following:
- it had to be wireless
- it had to support the more secure WPA-2
- it
had to support MAC filtering
- it had to support 802.11n transfer speeds
- it had to be
totally battery powered for with a lifespan of at least 12 hours or more
- it had to not need an existing
wireless network (be it's own Wireless Access Point)
- it had to be something that is small enough to fit on the
belt and was very light
- the entire project had to all cost under $150 total
I found several wireless routers/Access Points, but surprisingly none that met my criteria and the most difficult being the battery life, so I split the setup into two parts... the battery powered wireless router and a small external battery that could charge the router's batteries on the fly, extending useable time to 12 or more hours.
The two items that seemed to best fit my criteria were the:
The Sapido wireless hotspot. This unit acts as a router, firewall, wireless access point, runs off of two 2200mAh Lithium Ion batteries that have a stand-by life of 20 hours and a runtime life of a stated 6 hours. The manufacturer lists the batteries included as "AA" batteries, they seem much larger.
This unit cost me $84.00
shipped to my door.
Now, the battery life did not meet my 12 hour criteria, so I
needed something to power this unit. If 4400mAh (2 X 2200mAh batteries) lasted 6
hours, I needed an external unit that was at least another 4400mAh and the
second item on my list is the ANKER 5600mAh external battery. It just seemed to fit the bill
beautifully and the fact that it could also be used to charge my iPhone and iPad
is just an added plus.
I paid $38 for this battery, again, shipped right to my door.
So what else is missing for this to work?
An ethernet cable. Now one could spend about $10-$20 for a cable, or could I use the materials and knowledge to make my own custom cable made to my exact length that I need for a couple dollars, but I have a nice 6-foot CAT5 cable sitting in my drawer from a previous project that is ready made already and that is what I use, just coil it up and reduced it's size to about 5 feet which is just PERFECT for my needs. Score a price of $0 for this item.
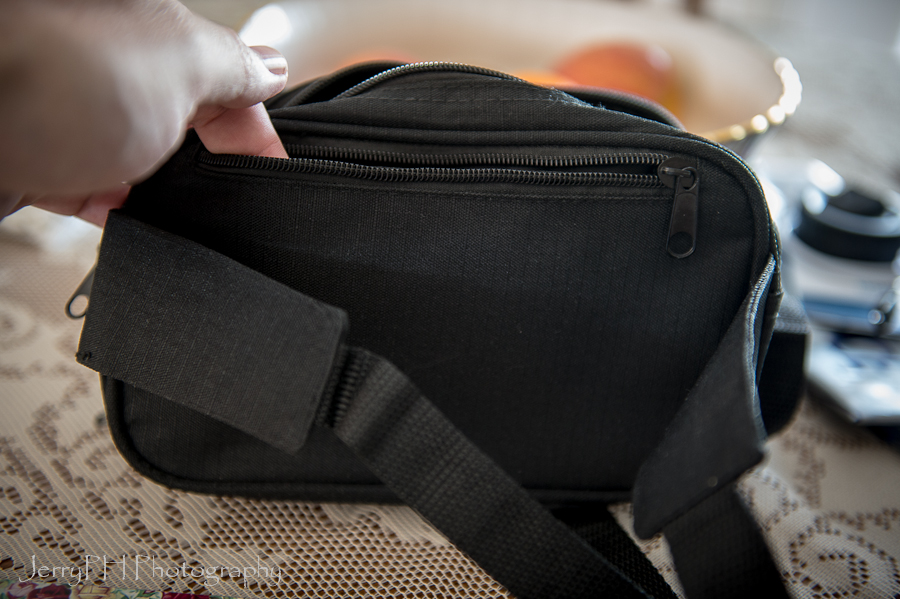
Last item is some kind of pouch or bag that holds this all together behind me on my belt. The solution to this was no farther than my local Walmart where I found something pretty nice for a mere $10.


So far, total money invested is well under my $150 budget right at $132 total... but does it all work? Well, the ANKER battery pack can power the router without any batteries in it, but it also charges the existing batteries perfectly, even with the router turned on. Expected total battery life with the internal and external packs together are around the 15 hour run times, so that is excellent. But does the router work and permit me to shoot and have the results shown on the iPad?
It sure does, but check out the video to see how well, anyway!
The router range is pretty impressive too, at around 50-60 feet, which is excellent considering this is a battery powered unit that is talking 802.11n protocols speeds!
Also, this tool lets me exploit other features like FTP uploading of the files directly to my laptop into a specific folder. What does that do? How about this scenario:
- as I take photos, they are placed on the cards in the camera
- the files are then sent to the laptop that is running an FTP server at around 1000-2000 kb/s transfer speeds
- the moment that the files are received, I have Lightroom 4 configured to use the "Watch Folder".
The Watch Folder is a feature within LR where it watches a specific folder (in my case, the same folder where all my files from the camera are sent to via FTP), and when something appears in there, LR moves it into another pre-defined folder of my choice and instantly imports them into it's database and is immediately ready to be worked on. This process is very fast with JPG files (a few seconds per file), but takes longer if you are using the much larger NEF RAW files from the D4 (about 30-45 seconds per photo).
The Watch Folder feature will not work without setting up an FTP server, and this is the most complicated part of the project, for someone not used to playing with networking at this level, IMHO. As easy as it was to make this thing work via HTTP, the FTP functionality
was a bit of a bear to make work smoothly, but it worked eventually. It turned out that it was more of an issue with
getting my 32-bit shareware FTP server application to work on Windows 7 Home
64-bit and set everything up (One could use IIS, but my laptop is WIN7
Home edition).
Ok, I know I may have just jumped into Techo-Geek warp talk for some of you... but bear with me... lol.
How about another feature... the ability to remotely and wirelessly control all video and photo taking aspects of the D4 camera? Yup... all built-in right into the D4 and I can use my iPad, iPhone or laptop's browsers to do this as well!
Amazingly, a perfectly functioning wireless tethering and remote control solution all for under $150 instead of paying over $900 for the Nikon solution!
The only thing is that there is a CAT5 wire going from the camera down your arm to your waist area and to the router that is in a small belt pack on the small of my back. I thought it would be an issue, but that CAT5 wire is not as intrusive as you may think (though it does take a little getting used to). Nothing drags on the ground and the wire doesn't stick out and it is actually challenging to try to get caught on anything during normal use. Sitting or laying on the ground poses no issues that I can see so far.
Something that surprised me is how stable this all is and how well it works. At one point, I turned off the camera and closed the lid of the laptop, placing it in hibernate mode. Five minutes later I opened the camera, took some shots, opened the laptop back up, continued shooting and as soon as the camera detected that the FTP server was "alive" again, it just started sending all the files I had taken during this time period by itself without further prodding. If it lost the connection for whatever reason, it politely resumed the process once it was reconnected.
So... what's next?
Well, I'd love to be able to have some way to hold my iPad2 to a lightstand securely and though that sounds easy enough, things get a little complicated when that same iPad2 is protected by a Griffin Survivor case, which makes it 3-4 times thicker, rendering most holders pretty much useless.
I have a little something coming from the Orient that may offer me a nice solution (an iPad2 holder made to hold an iPad to the back of a car seat) and this may offer me the option of working with a little DIY work.
A friend from the "D4 Professionals" Flickr discussion group offered a really smart alternative... a music stand. Now, it's not as portable as a lightstand solution, but for strength, it just cannot be beat (thanks Shepherd!) and there are some that fold up just like a lightstand.
Other than that, in the YouTube video about the wireless setup, I mention that out of the box, the D4 camera and Sapido Router/WAP settings are not as secure as it could be and mention some things that should be done so that no one can "attach" to your D4 and fire it, change settings, take video or photos or see your shots. So I will be adding another video on how to do things like change the SSID (your wireless network's name), how to encrypt the communication between the router and your iPad or laptop and overall, just make it a lot more secure.
Just a quick note, if you get the Sapido MB-1132 router, the default language that it comes in is CHINESE (Mandarin unless I miss my guess?)... everything is in that language, and I had to reference the manual on how to change the default language... I was freaking out there for 2 seconds until I found it, but this is one of those first things that I should show you in that future video.
MAY 17, 2012:
Well, my little item from Hong Kong came in... it was an iPad2 holder for car seats and I was looking for ways to DIY a mount and get it on to a light stand. No such luck... the critical part where the ball head attaches to the stand is held in place by a custom piece that just does not fit. I need to look at other options. The good news is that this thing was adjustable in terms of how thick something was, and it did hold my iPad2 with the Griffin Survivor case easily... too bad there is no way to attach it securely to a lightstand.
MAY 19, 2012:
I was looking around on Amazon when I found a stand that had the bottom of a lightstand and the top of an iPad holder... it looked really nice, but the cost was $50US plus shipping and what not... a bit high, but it looked really nice:
(click on the photo to go to the link on Amazon where I found this stand)

I then looked at another photo that showed the actual iPad holder in a little more detail:

This darn thing looked EXACTLY like what I received from the Orient, but with the back part that holds the whole thing to the car seat removed... I started thinking but put things away for a time.
Fate sometimes has a funny way of tapping on our shoulder, and it was about 2 hours later that a possibility just might have presented itself in my head.
About a year ago, I bought my niece a microphone stand and microphone so that she could place it closer to her piano and more easily record herself sing as she played. Well, she did not outgrow the piano or singing, but about a month ago, she outgrew recording her songs, so her mom (my sister), asked me if I wanted the microphone stand back before she placed it in a garage sale, and I said sure! As soon as I recalled having this stand mixed in on the shelf with all my other light stands, I pulled it out for a little look. It had potential!

I liked the fact that it had a bit of counter-weight, it had a metal base and had some heft to it.

This is the top of the stand where I took out the microphone clip... things were churning in my head and the start of an idea was beginning.

The base was nice and wide, well strong enough to support an iPad2.

Now, a plan took shape... what if I took that top piece and filed down that part so that it was flat, and used some strong contact cement to hold the adapter that the ballhead of the iPad2 holder used? This *just* might work!

The part above is the piece that has to be cemented to the filed down stand, and from there, just screw on the plastic ballhead and attach the rest of the iPad2 holder... and voila, a custom iPad2 stand! Just to let you know, this part was inside the portion of the iPad holder that attached to the section that clamps on to the headrest, so that part had to be unscrewed and taken apart so I could get to it.
BTW, some are curious as to how much I paid for the iPad2 holder for car seats with delivery... very little... $11 shipped to my door. The microphone stand initially cost me $15. So, total cost, $26.
Next step, I cut off the top using a hand saw, it comes out looking like this.

Needs some work, so I file down one end with the dremel in just a few seconds.

Then the next, and it comes out looking nice and flat.

Next, I use contact cement to bond the adapter for the ballhead on the end. Pardon the slight blur, I was lightly bumped just as I took this shot and did not notice until it was too late. I may retake this shot later, but you guys get the idea, right?

Time to let the glue dry overnight. That may be overkill to wait that long, but I was quite generous with the amount of glue and want to make sure it is completed cured before I test it out.
MAY 24, 2012:
Well, it took me 2 tries to find the best way to attach that section to the stand. The first one was just not cutting it in the strength department, so the new winner was... clear automotive epoxy. It works really well and is strong, but it did add $9.02 cents to the overall cost, which was fine.


May 26, 2012:
And the final part of this small project is completed! I've just finished uploading the video on how to secure the connection between your iPad (or laptop or whatever) of the wireless network created by the Sapido router to your Nikon D4 camera.
The video covers the following:
1 - Change display language from the default Chinese to English
2 - Change the SSID (wireless network name)
3 - Select the proper time zone
4 - Change the default router password
5 - Encrypt the data with the WPA2 protocol
6 - Enter the MAC addresses of the entities you wish to give access to
the wireless network (D4, iPad and possibly your laptop, for example)
The video is best viewed full screen, for most detail.
___________________________________________________
That's about it for now. As my love affair evolves with the D4 and I play and find other things to add here, rest assured that I will expand on this post and continue to offer you my thoughts and ideas.
ENJOY!